Trézor.io/start (Official) | Set up your #Trézor
Cryptocurrency has revolutionized the way we handle finances, providing individuals with secure, decentralized options for storing and managing digital assets. However, with this innovation comes the challenge of protecting your crypto from hacks and phishing attacks. This is where Trézor, the world-renowned hardware wallet, comes in. Whether you are a beginner or a seasoned crypto enthusiast, setting up your Trézor device through Trézor.io/start
ensures you can manage your cryptocurrencies safely and efficiently.
Why Choose a Trézor Hardware Wallet?
A hardware wallet like Trézor provides unmatched security for your digital assets. Unlike software wallets that are vulnerable to malware and online threats, Trézor stores your private keys offline, ensuring they never touch the internet. This offline security layer is crucial for protecting your cryptocurrencies against hacking attempts, phishing scams, and other cyber threats.
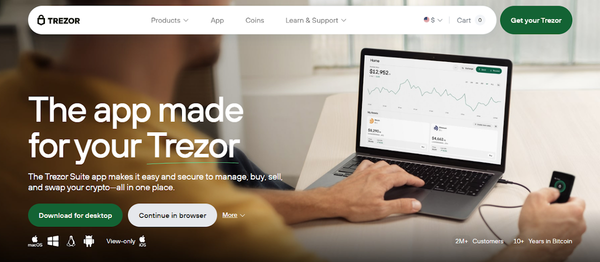
Trézor supports a wide range of cryptocurrencies, including Bitcoin, Ethereum, and thousands of ERC-20 tokens. It also integrates seamlessly with popular wallet interfaces such as Trézor Suite, giving you a smooth experience for managing, sending, and receiving your crypto.
Step-by-Step Guide to Setting Up Your Trézor
Setting up your Trézor device is simple and intuitive. By following the official guide on Trézor.io/start, you ensure your wallet is secure from the start.
1. Unbox and Inspect Your Device
Start by unboxing your Trézor wallet. Verify the authenticity of your device—official Trézor devices come with tamper-evident seals. Inspect the package for any signs of tampering. If anything seems off, contact Trézor support immediately.
2. Connect Your Device
Use the supplied USB cable to connect your Trézor device to your computer. Trézor supports both desktop and web-based interfaces, allowing flexibility depending on your preference.
3. Visit Trézor.io/start
Open your web browser and go to Trézor.io/start
. This official page guides you through the installation of Trézor Suite, the platform that manages your crypto assets. The website will detect your device and prompt you to download the latest version of Trézor Suite compatible with your operating system.
4. Install Trézor Suite
Follow the on-screen instructions to install Trézor Suite. The installation is straightforward and secure, with the application designed to protect your private keys and sensitive information. Once installed, launch Trézor Suite and connect your device.
5. Initialize Your Device
You will have two options: create a new wallet or recover an existing wallet. If you are setting up Trézor for the first time, select “Create a new wallet.” The device will generate a 24-word recovery seed, which is your ultimate backup.
6. Secure Your Recovery Seed
The 24-word recovery seed is critical. Write it down on the included recovery card and store it in a safe location offline. Never store your recovery seed digitally or share it with anyone. This seed is the key to recovering your wallet if your device is lost or damaged.
7. Set a PIN Code
Trézor will prompt you to create a PIN code. This PIN adds another layer of security, preventing unauthorized access even if someone physically obtains your device. Choose a strong, unique PIN that is easy for you to remember but difficult for others to guess.
8. Confirm Your Seed
Before you can use your wallet, Trézor will ask you to confirm your recovery seed. This step ensures that you have accurately written down all 24 words. Accuracy here is vital to safeguarding your assets.
9. Start Using Your Wallet
Once setup is complete, your Trézor wallet is ready. Through Trézor Suite, you can send, receive, and manage your cryptocurrencies. The suite also offers features like real-time portfolio tracking, integration with exchanges, and secure transaction verification.
Tips for Maximum Security
- Keep Your Seed Offline: Avoid taking photos or storing it digitally.
- Regular Firmware Updates: Trézor frequently updates its firmware to patch security vulnerabilities.
- Beware of Phishing: Always access your wallet through official links like Trézor.io/start.
Conclusion
Setting up your Trézor wallet through Trézor.io/start is the first step toward safeguarding your cryptocurrency investments. The process is user-friendly, even for beginners, and emphasizes security at every stage—from initializing your device to managing your crypto. With Trézor, you gain not just a hardware wallet but peace of mind, knowing your assets are protected by one of the most trusted solutions in the crypto space.
Take control of your crypto securely and efficiently—start your journey with Trézor.io/start today.